Introduction
It was September 2022, Vic and I decided to start working on a Halloween project. It would be a lot of fun for both of us. We’d have around one whole month to complete the project.
The general goals of the project:
- Have fun
- Learn about team work
- Do some drawing and painting (Vic loves to draw)
- Create something related to the videogame Vic liked to play very much at that time, Plants Vs Zombies 2 (PVZ2), which was something suitable for Halloween, indeed
- Try to inspire Vic about the beauty in making things
- Work with several materials (cardboard, paint, brushes, electronics, programming, music and sounds)
- Have it ready by Día de Muertos/Halloween
Design & Art
We wanted to work on something related to Plants Vs Zombies 2.
Some interactive project features would be nice, so that kids could touch and get some exciting response.
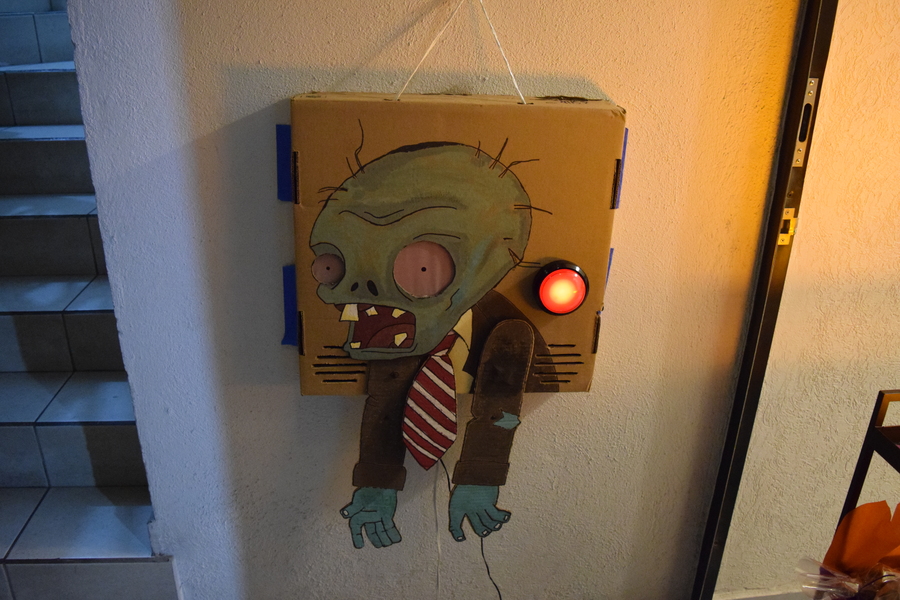
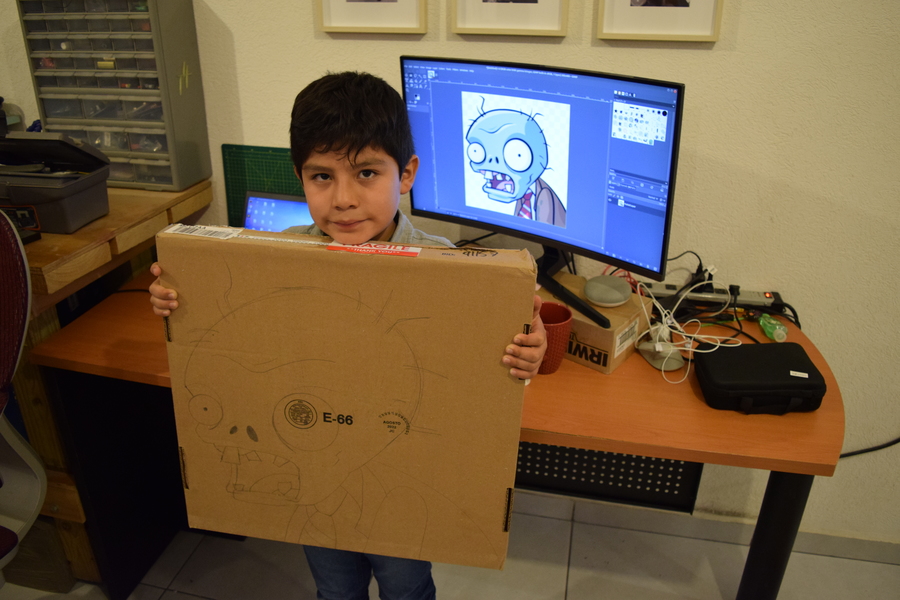
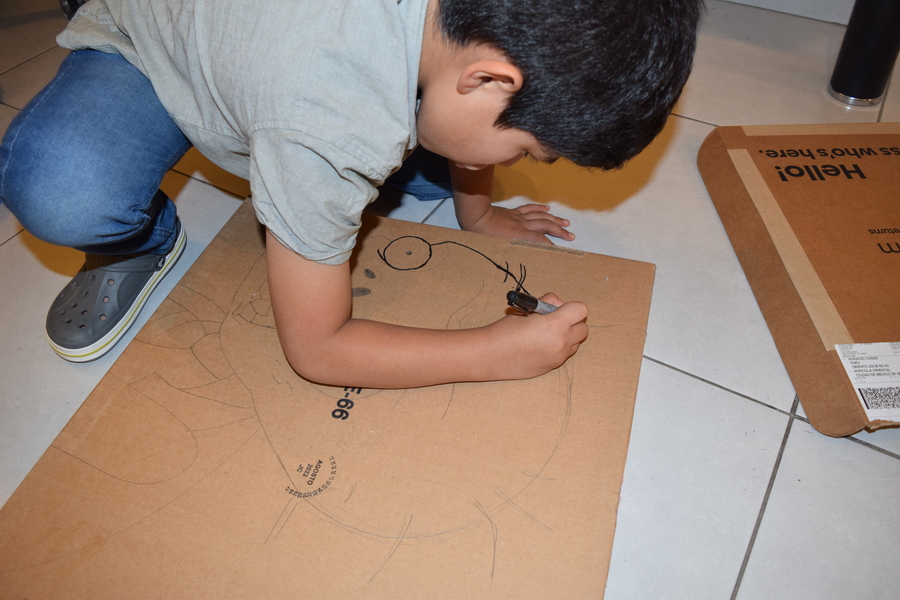
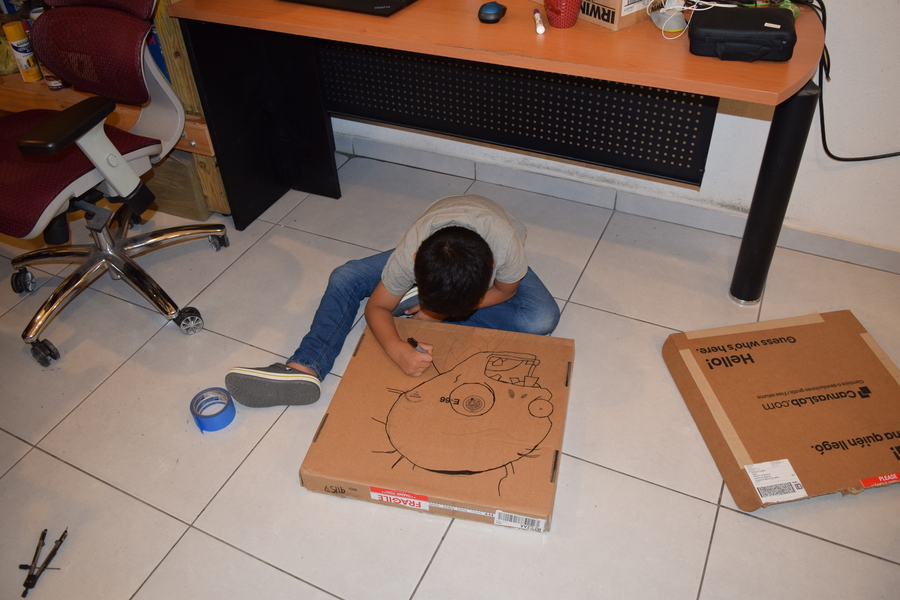
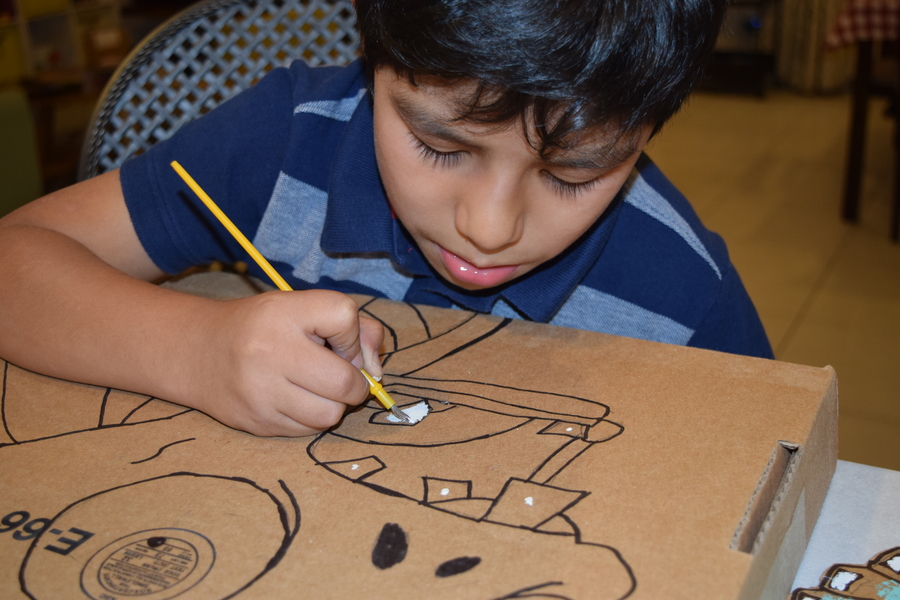
We started to sketch the zombie in a cardboard box. I suggested Vic to use the main character from Plants Vs Zombies 2 since many people can recognize it and it’s kind of related to Halloween. He agreed.
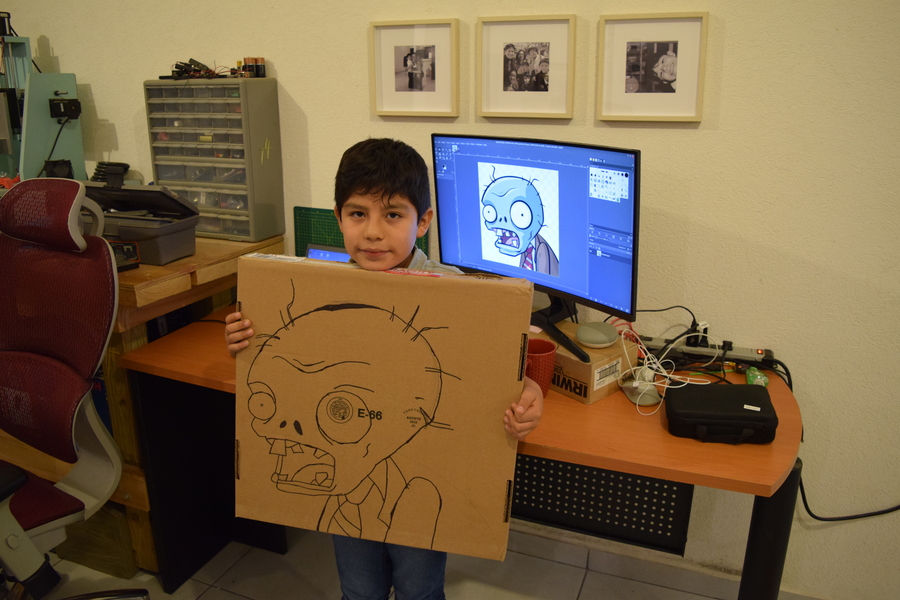
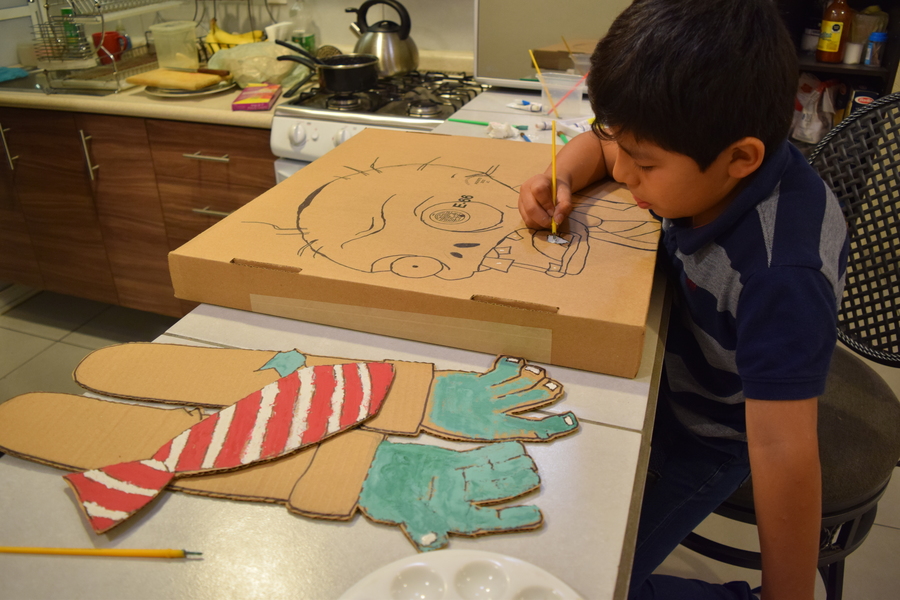
We started to think about the moving parts for the zombie. He definitely needed some arms so that we could make them move.
His tie makes him even cooler 😉

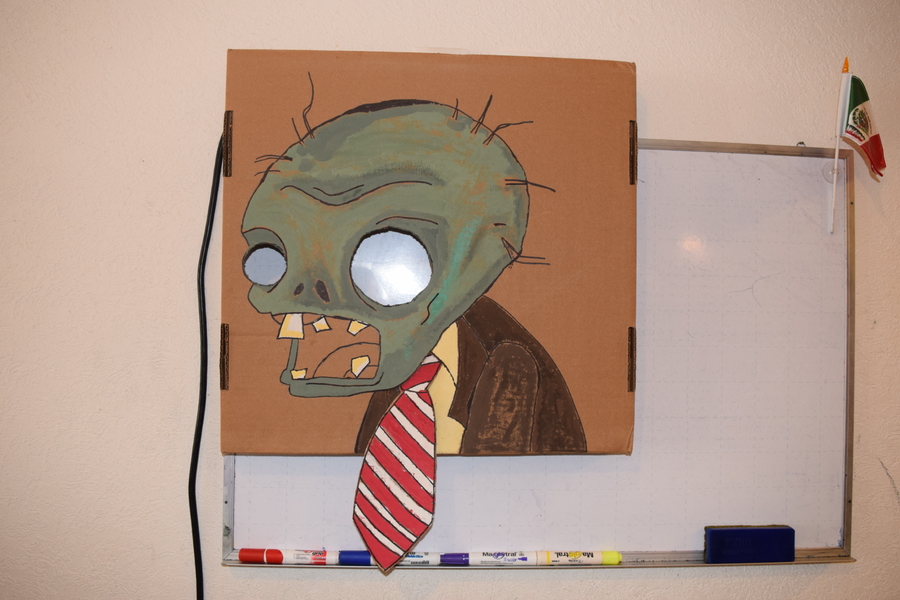
Once we were happy with the design, we went ahead and started to color the zombie.
Functionality
The planned functionality for the zombie is as follows:
The zombie will play Plants Vs Zombies 2 background music, it will play different songs from the original PVZ videogame soundtrack while in idle state. Using the audio amplifier we can control volume.
The input for the zombie is a big red dome pushbutton. Pressing the pushbutton will make the zombie groan, his eyes will flash and his arms will move.
The big red dome pushbutton has an internal 12 V light bulb. It will flash slowly (like a heartbeat) to entice people to push it.
For future versions I would like to add a PIR movement sensor and/or a proximity sensor to trigger some actions.
Materials
- 1 Arduino nano
- 1 DFPlayerMini Mini mp3 player
- 1 HW-210 PAM8610 Audio amplifier
- 2 20 watts speakers
- 1 Servomotor Mg995
- 1 Big dome pushbutton
- 1 LED strip
- 2 MOSFETs IRFZ44N
- 2 PCB screw terminal block connectors
- 1 PCB 3.5 mm audio jack connector
- 3 Headers
- 1 Perfboard
- 1 12V/5V DC power supply
- Wires
Electronics setup
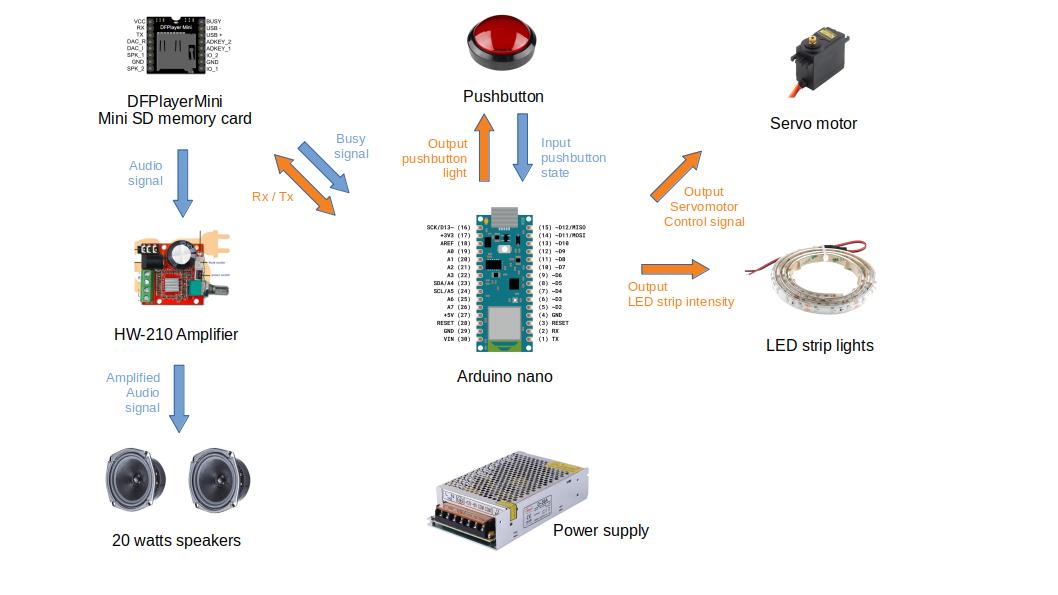
| Component (feature) | Input/Output | Arduino Pin |
| Pushbutton light | 1 input ON/OFF | 2 |
| Pushbutton state | 1 output PWM 0-255 | 3 |
| LED strip light (eyes) | 1 output PWM 0-255 | 5 |
| Audio (music & sound effects) | 1 input / 1 output Rx/Tx | 10 / 11 |
| Audio (busy signal) | 1 input | 13 |
| Servomotor (arms) | 1 output Servo | 7 |
Arduino sketch
Please find the Arduino sketch in github: halloween2022.ino
Final electronics setup
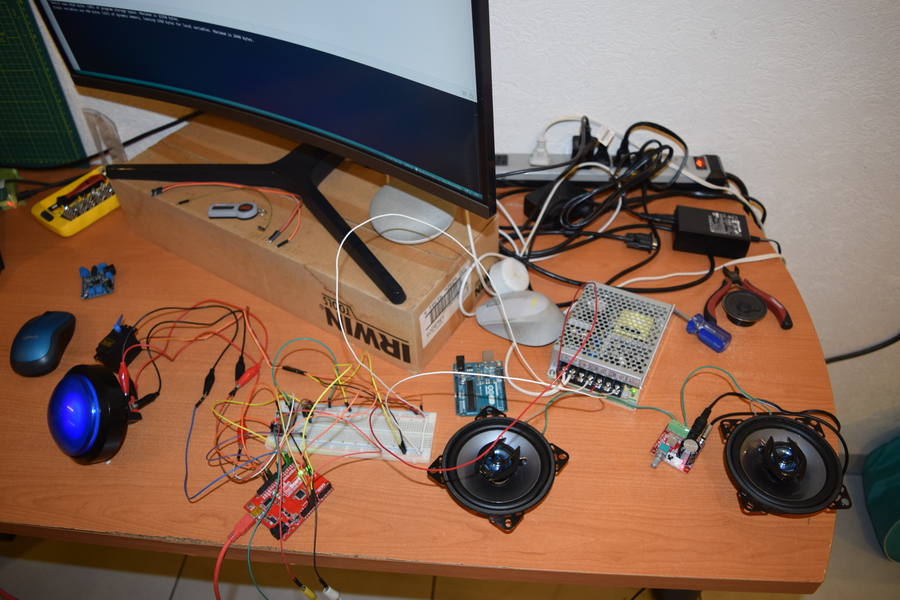
After testing the wiring and the Arduino sketch with all the components connected, we were ready to prepare the final setup.
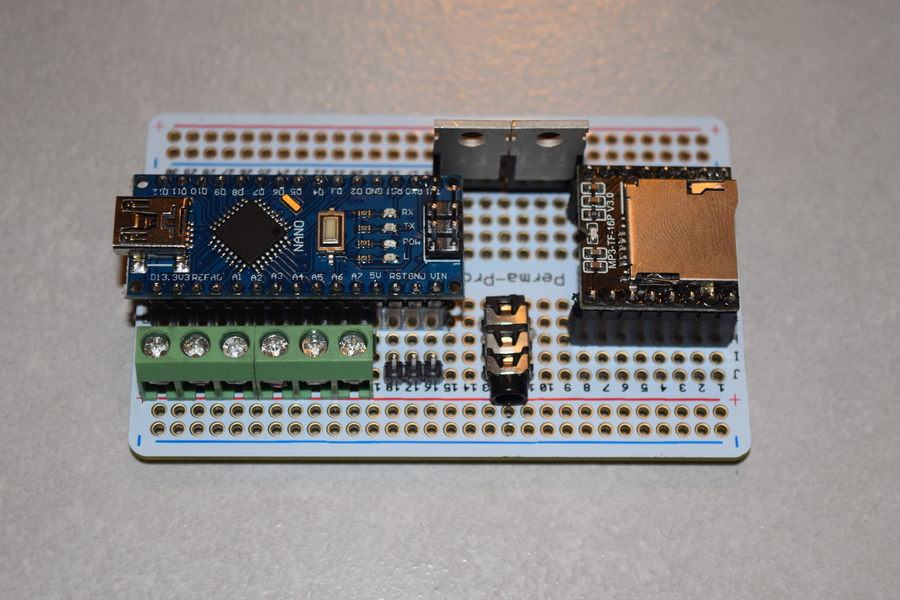
I used a perfboard to place the electronics:
- Arduino nano
- DFPlayerMini
- IRFZ44N MOSFETs to control 12V lights (see How to drive a 12V led strip with a microcontroller)
- PCB screw terminal block connectors
- PCB 3.5 mm audio jack connector
- Headers
Internal MDF board
With electronics and program ready, it was time to put things in place such as speakers, pushbutton, servomotor and LED strip. We used 3 mm MDF board to hold things thight.

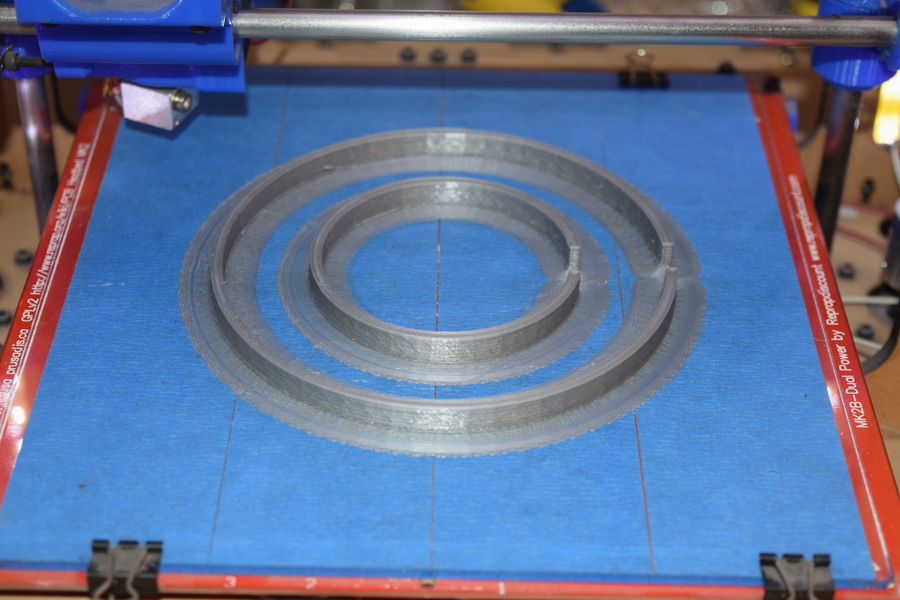
We also 3d-printed some PLA rings. The rings are the required support to glue the LED strips around the zombie’s eyes.
Internal wiring
Below you can see the internals of the animated zombie placed on the MDF board.
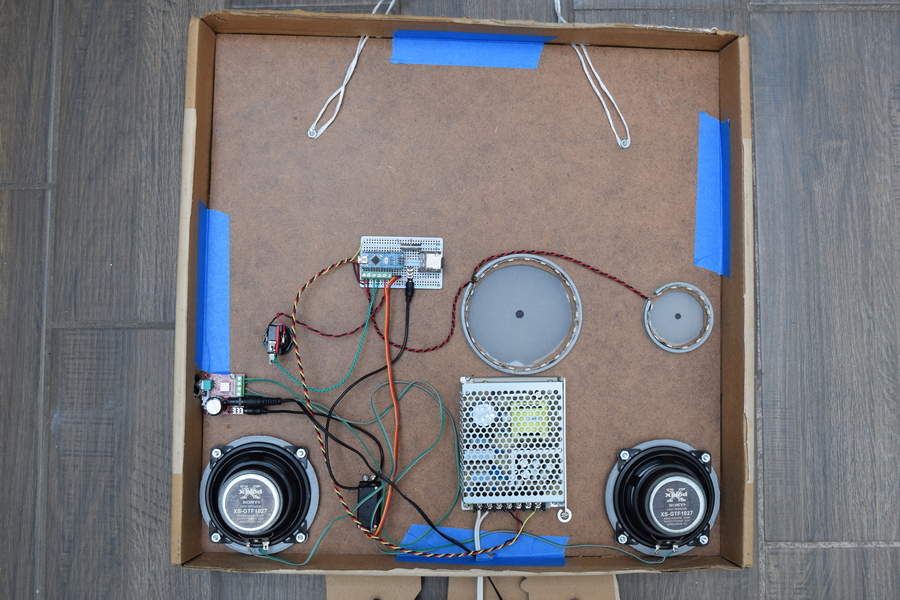
Above, from left to right
- The audio amplifier (I made a small hole to access the volume knob)
- The pushbutton switch
- The control board where both the Arduino nano and the mp3 player sit.
- LED strips in circles for the zombie’s eyes
Below, again from left to right
- Left speaker
- Servomotor for moving the zombie’s arms
- Power supply
- Right speaker
Final presentation, right on time!
The zombie premiered successfully on 11/1/2022. It was a great attraction for the kids. I think they enjoyed it.
