Introduction
Raspberry Pi GPIO pins work at 3.3 volts and the current you can draw from them is quite limited for many applications (16 mA – 50 mA).
An external power source and a power interface are required to control a 12 volts DC motor (or solenoid) from a Raspberry Pi GPIO pin.
Materials
- N-Channel MOSFET (FQP30N06L/RFP30N06LE) x 1
- 10 kΩ resistor x 1
- 1N4001 rectifier diode x 1
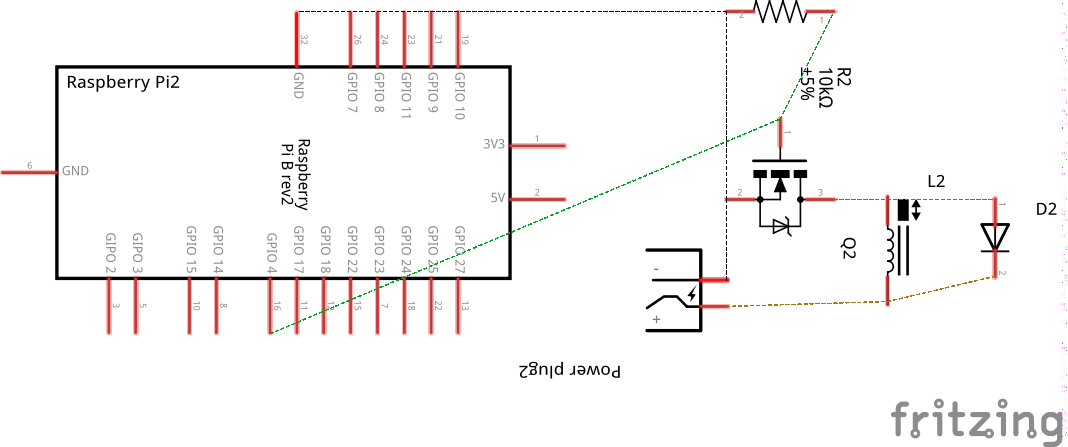
Schematic diagram
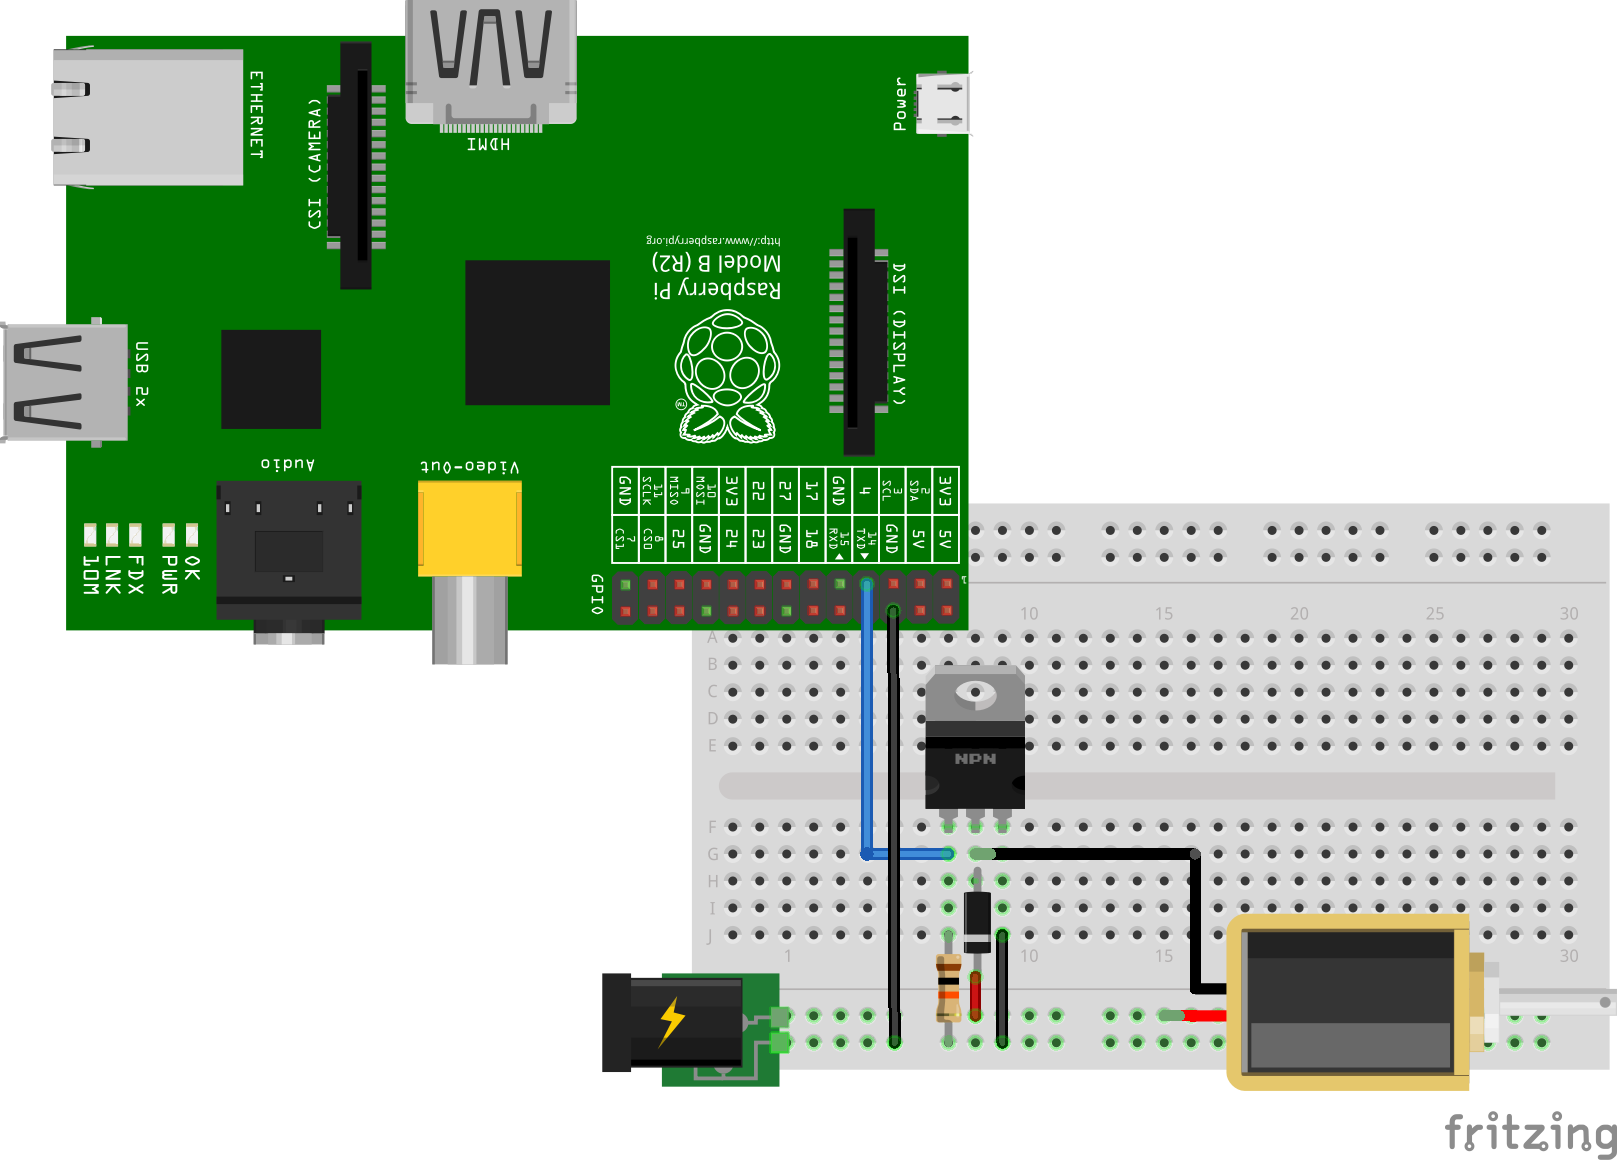
Wiring diagram
Components explanation
The power interface between our Raspberry Pi signal pin and the 12 volts DC actuator we’d like to control is a MOSFET (metal–oxide–semiconductor field-effect transistor).
The 10 kΩ resistor is used as a pull down resistor for the MOSFET to have a well defined gate input level at any time.
FInally, the rectifier diode 1N4001 is for kickback protection (should be placed across solenoids, relays & DC motors to safely discharge the spikes generated by the coils and avoid damaging the Raspberry Pi signal pin)
Python test code
#! /usr/bin/python

import sys
import RPi.GPIO as GPIO
import time

GPIO.setmode(GPIO.BCM)
CTRL_PIN = 4
GPIO.setup(CTRL_PIN, GPIO.OUT)

print "SOLENOID CTRL Test (CTRL+C to exit)"
time.sleep(2)
print "Ready"

try:
  while True:
    print "On"
    GPIO.output(CTRL_PIN, True)
    time.sleep(1)
    print "Off"
    GPIO.output(CTRL_PIN, False)
    time.sleep(1)
except KeyboardInterrupt:
  print 'Quit'
  GPIO.cleanup()
except:
  print 'Unexpected error: ', sys.exc_info()[0]
This python program will turn on/off your motor every second until you exit the program by pressing CTRL + C.
Note that the control GPIO pin is defined in the program as pin number 4 (see the wiring diagram above).
No lo tienes la version para Arduino?
Saludos!
hi there,
Would it be possible to use a power supply of 12V 1.5A with this circuit?
Hey Sidney
Yes, it’s ok to use such a power supply (12V, 1.5A)
Regards!